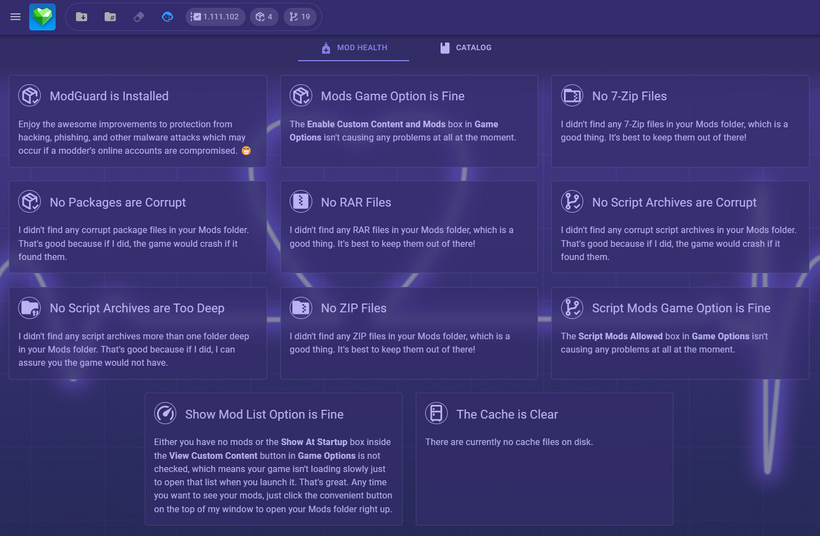
PlumbBuddy
You might have heard about it already. It’s a new app that’s designed to help you keep your mods folder clean and healthy. For Mac and Windows–that was a priority.
The Legal Stuff
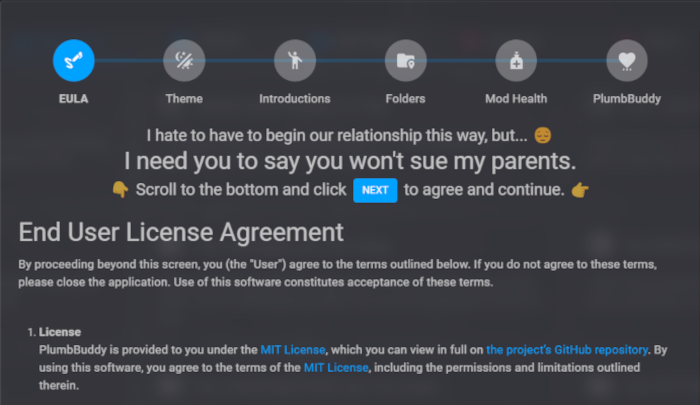
When you first install and open PlumbBuddy, the first thing you’ll see is the End User License Agreement. You have to agree to this to use PlumbBuddy. Read through it, and then click the Next button at the bottom right.
Themes
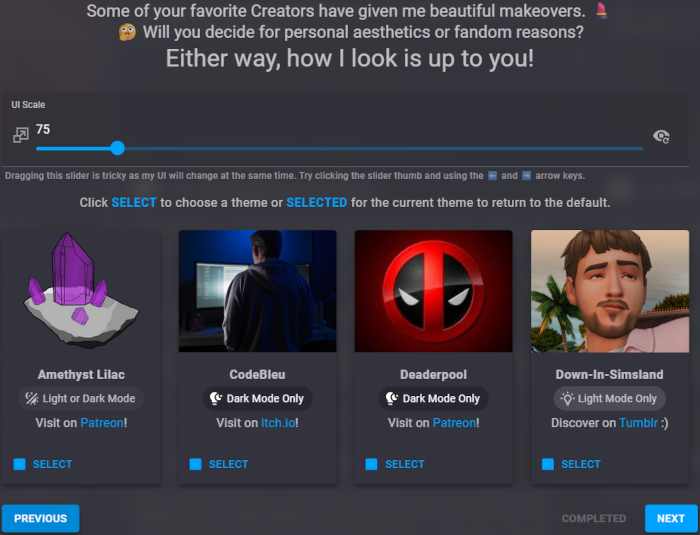
At the top of the themes tab, you can choose the scale of PlumbBuddy’s UI. You have options on how to do this: type in the scale you want, use the arrows to increase or decrease the scale, click on the circle on the slider and use the left and right buttons on your keyboard, click and drag the slider (NOT recommended), or hold Ctrl on your keyboard and scroll your mouse wheel or use the + and – buttons on your keyboard. You can reset to the default using the button on the right.
PlumbBuddy has a default light or dark theme based on your computer’s settings, but you can choose from a variety of other themes that are included. Some are light mode only, some are dark mode only, and some have both — those follow your computer’s settings.
On the second tab, you can pick which one you want to use. Click on them to see what they look like, and click on them again to turn them off. Pick one (or none) for now, and then click next at the bottom right. If you want to, you can change your theme later in Settings.
This guide uses the default dark mode theme, but you can use whatever you want.
Introductions
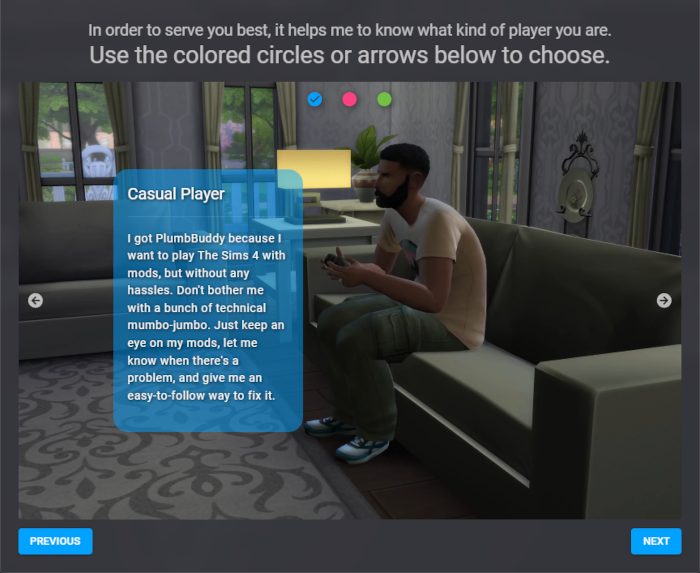
On the Introductions tab, you choose if you’re a Casual Player, an Enthusiast Player, or a Mod Creator. Which you choose decides what options are enabled for default for you, how much information is displayed, and what you can do with PlumbBuddy.
By default, Casual Players will be warned if you have an error file and if you’re missing ModGuard. Most Mod Health scans will be active, but you can turn them off in Settings afterwards, or by clicking Stop Telling Me when PlumbBuddy alerts you to something.
You can switch between types by clicking the circles at the top (blue for Casual, red for Enthusiast, or green for Creator) or by using the arrows on the sides of the picture.
Pick Casual (blue) and click Next at the bottom right.
Folders
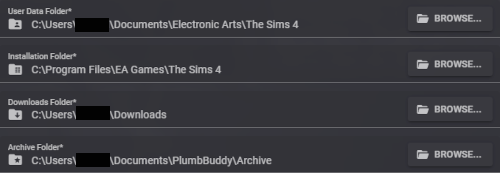
The folders tab is kind of important. Don’t worry, PlumbBuddy will auto detect this information. For most people, it’s fine to glance at it, make sure it looks okay, and move on.
Everything on this tab is required for PlumbBuddy to work. PlumbBuddy needs to know where your game and mods and downloads folder are, and where you want Archivist to put your save file backups if you choose to use Archivist — you don’t need to use Archivist if you don’t want to, but you do need to set a folder path.
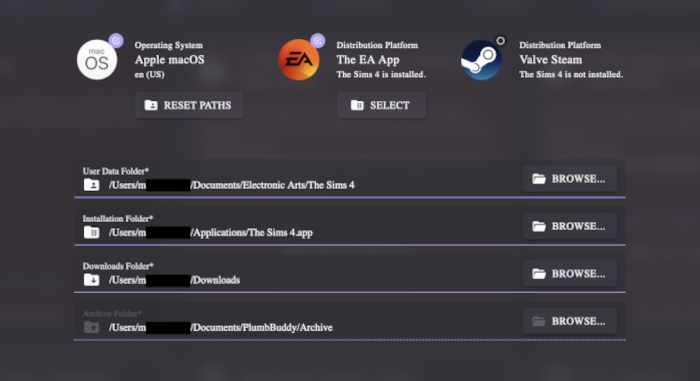
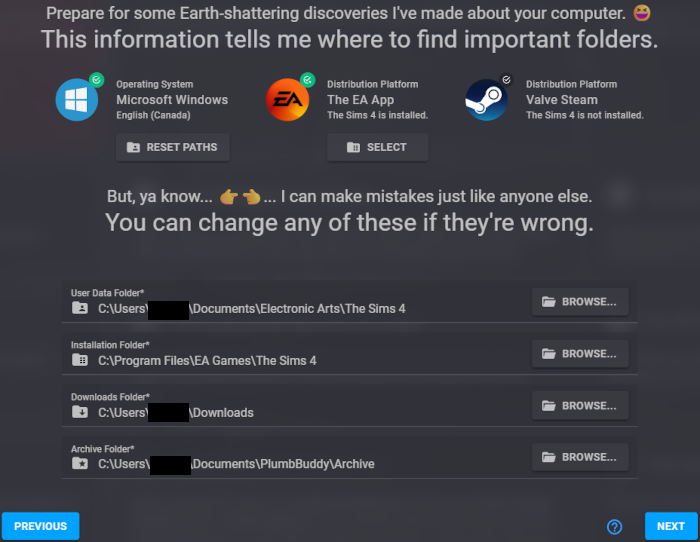
At the top, PlumbBuddy will show:
- Your operating system (Windows or Mac) and its language (which is the language PlumbBuddy will use, assuming a translation in that language exists — it will default to American English if your language isn’t included)
- If it detected the game installed using the EA app
- If it detected the game installed using Steam

If you have the game installed using both the EA app and Steam, you can pick which one is used by clicking the Select button underneath that install.
Below that, there are four boxes.
- The top box is your User Data Folder. This is where your Mods folder is.
- The second box is your Installation Folder. This is where the game is installed.
- The third box is your Downloads Folder. By default, this is your computer’s regular downloads folder, but you can change it to somewhere else if you want. This is used, for example, if you have a .zip file in your Mods folder and PlumbBuddy offers to move it out for you.
- The fourth box is where Archivist will store its database, if you activate it. By default, it will be a folder in your Documents folder, but you can put it anywhere you want. If the folder doesn’t already exist, it will be created when you turn Archivist on.
If you change any of these and then you want to go back to the default, click Reset Path for User Data and Downloads and Archivist, under your operating system at the top, and Select for Installation Files, under EA App/Steam.
If anything shows up red here, try clicking Reset Path or Select.

Once you’ve checked these or changed them, click Next at the bottom right.
Mod Health
Almost done!
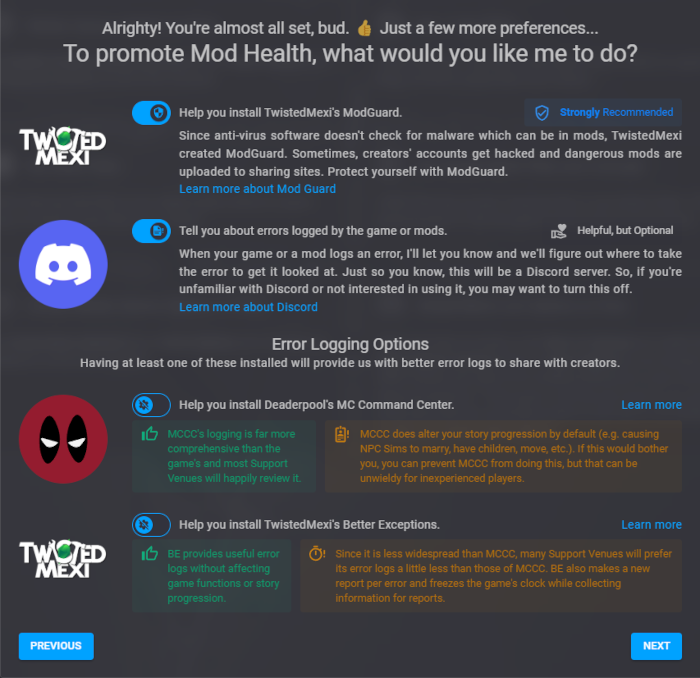
This tab will tell PlumbBuddy some key things that you want it to tell you.
The first two will default to on, meaning that PlumbBuddy will warn you if you’re missing ModGuard (which will try to warn you if you install a script with malware included) and if an error file appears in your The Sims 4 folder or your Mods folder (so that you can get help with it, which PlumbBuddy can guide you through).
The other two toggles are off by default. If you turn them on, they’ll warn you if you don’t have Better Exceptions or MC Command Center installed and help you find them. It’s strongly recommended to have one or both of these, because the game’s error files are… let’s say… less than ideal. Both of these mods will give improved error file that can help you find the cause of your errors or give the people helping you more information to help you with, among other things.
Once you’ve made your decisions, click Next on the bottom right.
